The Art and Science of Detailing your Porsche.
By Scot Anderson
Ok, so I’m not sure how much science there is behind detailing your car. No wait, what I mean to say is – if there is science, that’s for the manufacturers of the detailing product. As far as I’m concerned, detailing is more art. That’s art, patience and anal retentiveness… of which I have plenty.
First, let’s discuss the three rules of auto detailing – no scratches, no scratches, no scratches. Okay, now that we’ve got that covered, we can move on to the basics.
Step 1: Washing
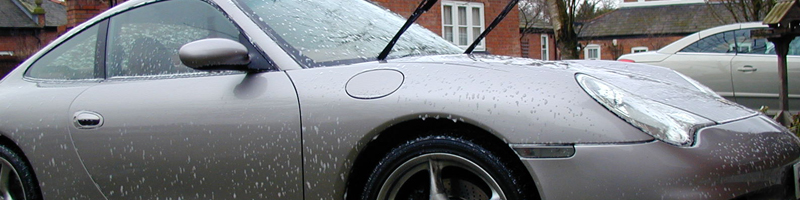
Washing a car starts with water and soap, lots of both, that is. Water is the lubricant and soap, by its organic structure, locks the dirt and oil within its molecule, so that water can wash it away. Not just any soap. You need automobile car washing soap, which is [ph] balanced not to harm the paint and the finish on your car. Follow the manufacturer’s recommendations for mixing soap to water. Using dish-soap will remove the finish on your car and is not recommended.
Some professionals will use two buckets – one for water and soap and the other for rinsing the sponge. It is also recommended that when your soap bucket gets down to one third full, empty the bucket, rinse and then refill with soap and water. Remember it’s the dirt that causes scratches and that’s what we are trying to avoid.
Washing your car also goes beyond water and soap. We need to discuss temperature and humidity. It is never recommended to wash your car in direct sunlight because of the fact that the sun will dry the soap on your car, leaving a ring of scum, oil, dirt and in Jackson, a hard water stain (ie. calcium). If you must wash your car in the sun, keep the hose handy and rinse frequently. Ultimately, washing indoors, under a cover, in the morning or on a cloudy day is ideal. Higher humidity allows you to wash without the soap drying on your car. The days that I’ve washed my car on a cloudy day, where very little of the water evaporates, took about half the time. On those days there was a lot less reaching for the hose and water.
There are many types of sponges out there, including natural or synthetic materials. Sheepskin mittens are also very useful and help to hold dirt away from the paint. Washing your car should start with the wheel wells first. Hitting the dirt in these areas prevents the mud and oil from washing back onto the exterior surfaces of a freshly washed car. Dressing the wheel wells also makes a huge improvement in the appearance of a well cleaned automobile. By spraying the wheel wells with an inexpensive dressing (like a Black Magic or some other oil) will make a huge improvement in your well cleaned Porsche. The true test easily shows up at night when you shine your headlights on dirty wheel wells that appear gray or tan instead of black. A well dressed wheel well will show up black reflecting the black plastic panels and anti-rust coating on the well itself, helping the wheels on your Porsche fill the well.
Once the wells are clean, you can then proceed with the exterior wash. It is here that you should start at the top of your car and work your way down. This works to your benefit during the rinse cycle as it tends to wash away dirt lying on the lower parts of your car. Washing should also occur in sections so that you can avoid the water or the soap from drying on your car. Keep the hose handy and rinse often. You may also need to wash the car twice; the first time is to get rid of the major layer of dirt and the second time to hit the nooks and crannies where the dirt hides.
When the car is washed completely, and you feel that you have removed all the dirt, now you can dry the car. Once again, we’re trying to avoid scratches and the water stains or the soap from drying on the car. I’ve used a variety of drying products, from terry cloth towels, micro fiber cloths to sham’s. Using a chamois, as it is called, is usually done wet. When chamois are dry, they are hard and can scratch your car.
Some auto-detail kits come with a very soft squeegee, something I have never tried. By experience, it works great on my bathroom shower door. I’m just not sure I would want to try it on my Porsche paint job for fear of trapping dirt under the rubber.
Remember that water can puddle under the hood, the bonnet or the door and it is therefore helpful to open all doors as you dry the car.
Step 2: Polishing.
Polishing is the next step in the game. Polishing is the process of removing oxidation and contaminants from the paints surface. The result of course, is to restore the paints shine.
There are three types of products we can use to accomplish this task – polish, cleaner and rubbing compound. All three products will remove very small amounts of paint from the surface and vary in degree of abrasiveness. Polishes remove the least amount of paint, rubbing compounds remove the most, and so called cleaners fall somewhere in between.
The trick is to use a product with the right degree of effectiveness. Starting with a polish is usually where most people begin. If the desired result is not achieved, you can try a second coat of polish or step up to a cleaner.
These products work similar to waxes – “wax on, wax off,” only instead it’s “polish on, polish off.” Always apply and remove waxes and polishes with a side to side movement. Do not use a circular movement as that will cause swirl marks. It also takes time for the product to dry and then it takes elbow grease to get them off. The longer the product dries, the harder it is to get off, so be sure to work in the shade and work in sections.
If you choose to use an orbital buffer, which will make the job go by faster, make sure you use a product that is specific for orbital buffers.
Using a rubbing compound is a fairly abrasive product and is usually only reserved for those neglected, never washed, never waxed cars that you see ten years down the road where rainwater absorbs into the paint. So be careful if you decide to use this product. I’d recommend experimenting on someone else’s car first when using rubbing compounds.
Step 3: Claying.
Claying is fairly new in the auto-detail world. The clay is similar to the silly putty we used as a kid, only its consistency is a little more solid. Claying is an option many car fanatics use to smooth out the paint and to remove the very same contaminants that polishing does. Unlike polishing however, claying is not abrasive. Claying also does not remove the wax from the cars surface, and therefore there is no need to reapply a coat of wax after you are finished.
However, I’ve never clayed my car without waxing it afterward. Usually my goal in detailing my car is to take the old coat of wax off, so that I can put on a new one. Therefore, claying for me has become a middle step in the process. It allows me to hit the painted surfaces of my car, as well as the glass and the trim pieces, one more time after I’ve polished the car and before a new coat of wax is applied.
With claying, most clay products require a lubricant of some kind and will normally give you some type of recommendation or product to use. From the claying products I have used in the past, the recommendation has been an ounce of car wash detergent in a water filled spray bottle. The car is then sprayed with the water/car wash solution in small sections, while the clay bar is rubbed over the section you just sprayed. The process is usually performed by working in a one foot by one foot section at a time and is pretty painless.
Once you have clayed your car, you can feel a significant improvement in the “smoothness” of the paint by running your hand over the surface… this my friends is a car free of contaminants.
Step 4: Waxing.
The function of a good wax job is obviously to protect the finish on your car. More specifically, wax will help the paint retain the oils to keep that everlasting luster and help reduce the oxidation process. Wax also helps by protecting the paint from bird droppings, tree sap, the sun’s harmful UV rays and all those contaminants we just removed during the polishing/claying process.
Waxes come in three forms – a liquid, a paste or a spray. They say that the paste lasts longer than the liquid, and the liquid lasts longer than the spray. I have never conducted the blind study to determine if this is in fact true – but then again, I’ve never gone that long between waxes to take notice. I have also never used a spray wax, so I can’t tell you if or how spray waxes actually work. It is claimed that spray waxes do not work because they do not go on heavy enough.
The question then remains, what type of wax to use. From research, most enthusiasts recommend a wax with a high Carnauba content. In the past I have used a synthetic product called Zaino that I like very much. I am sure there is a great debate over natural vs. synthetic. What I like so much about Zaino is the fact that I can apply it to any surface without the difficulty of trying to remove it. Zaino is super easy to remove from windows, window frames, and trim pieces, including the car itself.
As for Carnauba based products, they can be difficult to remove the longer they sit. Therefore, applying a thick coat of carnauba-based wax complicates the removal process. It is recommended to apply a thin coat, allow it to dry as the directions on the product state, and then remove the wax… working in sections of course. Multiple coats of wax are recommended. You can use the round applicators that normally come with the waxing product or you can purchase extra waxing applicators that are sold in most department stores. A damp rectangular kitchen sponge makes a good applicator as well, as its shape seems to be able to handle the smaller detailed areas of a car.
There are many products out there and some very good ones at that. The Performance Products Catalogue, for example, carries some of the more common products I have seen, like Zymol and P21S. Your local Porsche dealer also carries Porsche specific cleaners and waxes. They are also available through the Porsche website (Porsche.com). Porsche also sells a detail kit, which comes with a high grade aluminum case and a selection of carefully chosen products specific to your Porsche model. There is a kit for coupes and one for cabriolets. The cabriolet kit includes a convertible shampoo that is to be used on every washing and a cleaner that is recommended three times per year. All products within the kit are available separately through your dealer’s parts department so that you can refill your kit as needed. The kits are small, compact and in typical Porsche style, lightweight. They are perfect for the traveler who likes to keep his Porsche clean. Pulling the case out from under the bonnet makes for a quick and easy detail process.
When the wax is dry, remove the residue using only a very soft cloth. Microfiber towels work very well for this purpose. When you feel resistance in the cloth, fold the cloth over to find a new surface or use a new cloth. Again use the cloth with straight line movements to avoid swirl marks.
Using an orbital buffer will speed the process. A non-orbital buffer is even faster, but you risk “burning the paint.” For that reason, I recommend an orbital buffer to avoid “paint burns”.
When removing the wax, again the three rules of detailing apply – avoid scratches, avoid scratches, avoid scratches – which means be sure your cloth is free from dirt when you begin the waxing and throughout the removal process.
The hard part of removing wax is when you get wax in the hard to reach places or on the trim pieces. Those hard to reach places may require that you open a door or trunk to remove the wax. On other areas, like a name badge or trim piece, using a soft toothbrush very carefully, a Q Tip, gently using a wooden toothpick or the corner of a towel will be required to remove the wax residue. One way to minimize the difficulty of removing the wax on the trim pieces is to dress them first. By applying a protective film to all rubber, plastic or vinyl pieces that are adjacent to the painted surfaces, it is less likely that these pieces will absorb the wax and will make it infinitely easier during the removal process. It is also sometimes easier to tape off trim pieces using masking tape, which also makes it easier to remove the wax.
Most wax products state to wax your car every two to three months or more often in harsher climates. In Jackson, I usually wax my Porsche at the beginning of the summer and once at the end. And if I have time, I’ll hit it once during the summer or before any major Porsche Club event, for as the say in Germany, “a clean Porsche is a happy Porsche.”
The water test, however, is the real indicator for when your car needs a new coat of wax. When you are washing your car, during the rinse cycle, if the water fails to bead up or forms a “sheet,” then it’s time for a fresh coat of wax.
Step 5: The Tires.
As for the tires, cleaning them should take place at the end of the washing process. Using a separate sponge just for tires is definitely a good idea as the tires can have extra oil and dirt on them. For this reason, be sure to avoid scratching the rims and keep your sponge thoroughly rinsed. When you finish cleaning the rims, be sure to dry them as well – avoiding calcium deposits is also important in protecting the shine and the finish.
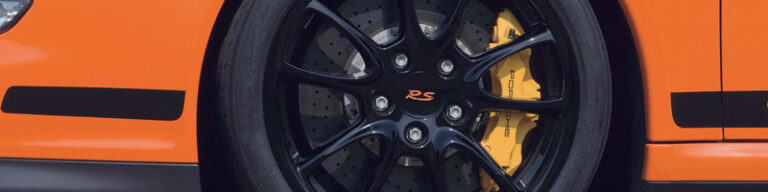
You can then follow up by detailing the rim itself. There are specific cleaners for the rims that aid in taking off the brake dust that can accumulate in the crevices of your expensive alloys. Porsche sells a great kit as do other manufacturers. The tire cleaning kits usually include a number of brushes used to help getting rid of the brake dust and road grime. The brushes go a long way in saving time and your fingers. Also, a nice coat of wax on the rims helps deflect brake dust and grime as well.
Step 6: The Interior.
Detailing the interior of your car should also be part of your cleaning process. Vacuuming should be your first step. Use a strong shop or home vacuum. The small ones that plug into a cigar lighter or operate on rechargeable batteries just don’t have the power to do the job. You should remove the floor mats from the car and do them separately. Vacuum all areas of the car, making sure to get under the seats. Use a brush attachment if necessary to avoid scratching the plastic pieces within your car. The crevice tool works great for getting those hard to reach areas.
If you decide to get down and dirty and want to shampoo the carpets or cloth seats, Bissel makes the “Little Green Machine,” which works great on cloth surfaces. There are other carpet cleaners out there as well. It is always recommended that you use hot water, which works on getting the dirt up from the carpet. When cleaning the floor mats, it is easiest to hit these during the exterior wash process. Simply blast them with the hose, which should remove most of the dirt. If you feel the need to apply a carpet cleaner to get our more of the dirt, this can be done as well. Just be sure to test the carpet first so that the product does not fade or alter the color of the carpet itself. You can work the carpet cleaner in with a brush to get out more of the dirt if you so choose.
When cleaning plastic floor mats, soap and a brush work great. Simple Green is also a product I have used that helps with the dirt and oil on the mat as well. Avoid using any type of dressing on the mats, as the dressing can be picked up by the driver’s shoes and cause for a slippery and dangerous braking or clutching situation.
The leather hides in your Porsche require protection from the harmful UV rays and the dust that can accumulate on them. There are specific cleaners for the leather that will take off the dirt and there are specific conditioners that will replace the oils in the leather. The leather conditioners are important in keeping the leather soft and pliable and by preventing cracks within the leather itself. My favorite leather products are those produced by Lexol, who makes a cleaner, a conditioner and a vinyl care product. Porsche also provides first rate leather products as well.
There are also interior detail tools available, like a variety of brushes in different shapes and sizes that can reach the insides of the vents or other tight places. Of course, Armor All is probably the most common interior cleaner that is readily available at most stores and is great in cleaning the plastic pieces and dashboard of your car. Dressing the interior of your car should be done first before you clean the windows. Cleaning the windows works great with a terry cloth towel or newspaper. Paper towels can leave a film on your window because of the dies within the towel.
Windex normally works great for most vehicles. However, Windex contains ammonia and is not recommended for your Porsche. Certain Porsche models have a film on the interior of their windows and ammonia will stain or discolor this film. Instead, a little soap and water will work wonders to remove the dirt and oil, or even better, a Porsche specific window cleaner. The plastic rear window on older convertibles will also need cleaning. Using Windex on the plastic is not a good option for the same reason, as it will discolor the window over time. The trick for the rear window is good old-fashioned Pledge. Pledge has the oils in the product that not only will prevent yellowing, but will also help lubricate the plastic as the top is raised and lowered and will help prevent the plastic from drying out and cracking.
And there you have it, a run down on the art of detailing your Porsche. I can only tell you that the aforementioned process takes time and patience, but with a little work, your car should be looking as sweet as ever.
If you don’t have the time for such a meticulous cleaning, our very own Auto Detail of Jackson does a great job at putting the shine back into your prized possession. Their rates are very reasonable, they take pride in what they do, and they especially like working on such fine cars.
Either way, you should be ready for that virgin ride. Pick a warm sunny day, put the top down or open the sunroof, and smile… because you’re driving a Porsche, one of the coolest cars on the road.